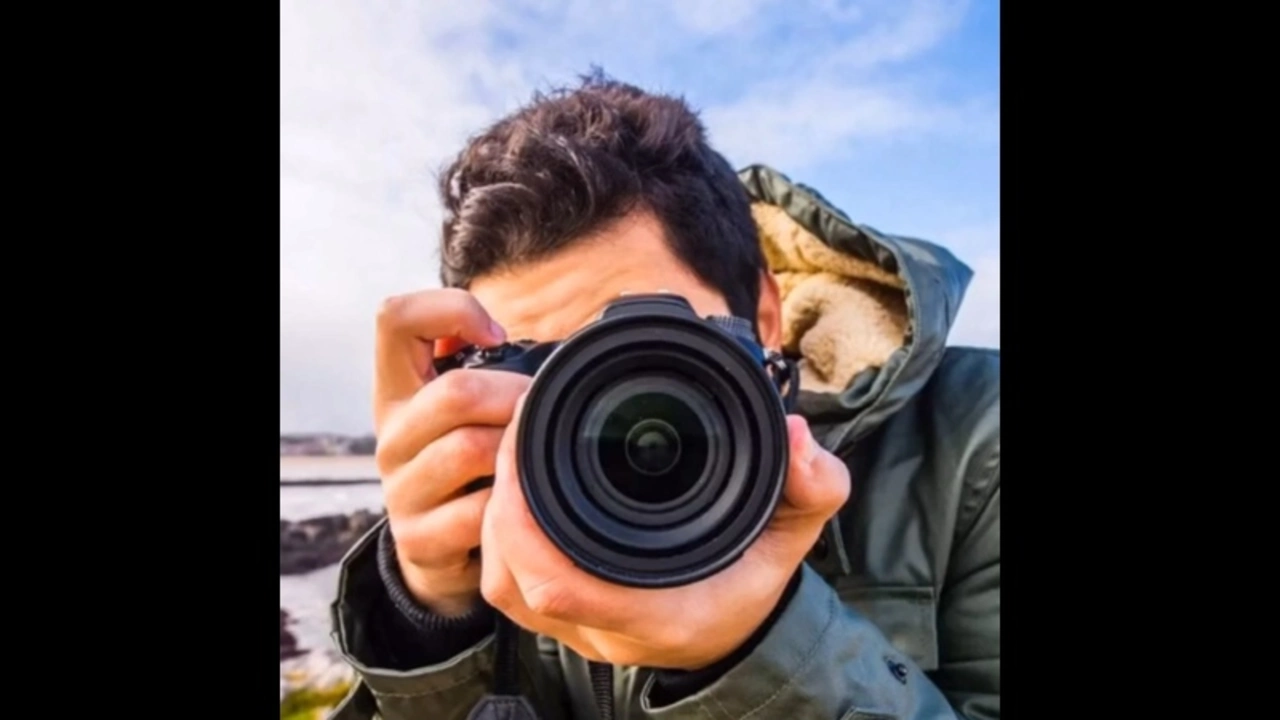
Understanding Myosis in Photography
Myosis in photography refers to the contraction of the camera's aperture, which plays a significant role in the final outcome of your shot. Just like the pupils of our eyes contract to limit the amount of light entering, the camera's aperture does the same. This has a profound impact on the depth of field, exposure, and focus of your shot. By understanding how myosis works in photography, you can manipulate your camera settings to capture the perfect shot that you envision.
Relationship Between Myosis and Depth of Field
Depth of field in photography refers to the range within a photo that appears sharp. The smaller the aperture (higher f-stop), the greater the depth of field, meaning more of the scene will be in focus. This is a result of myosis. When you want to capture a vast landscape in detail or want everything in your scene to be sharp, myosis comes into play. By contracting the aperture, you allow for a greater depth of field, making both the foreground and background appear sharp.
Implication of Myosis on Exposure
Exposure is another critical element in photography that is directly affected by myosis. When the aperture contracts, less light is allowed into the camera, resulting in a darker image. This can be a useful tool when shooting in bright conditions as it prevents the photo from being overexposed. However, in low light conditions, it can lead to underexposure. Therefore, understanding myosis and how it affects exposure will help you achieve the desired brightness or darkness in your photos.
Myosis and Focus in Photography
Focus is the sharpness of an image, and it's another area where myosis plays a crucial role. A smaller aperture, due to myosis, increases the focus range. This means more elements in your frame will be in sharp focus. This is particularly useful when you want to draw attention to multiple subjects in your frame. However, if you wish to isolate your subject from the background, a larger aperture (smaller f-stop) is desired, which results in a shallow depth of field.
Manipulating Myosis for Creative Effects
Understanding myosis can also help you achieve creative effects in your photography. For instance, the starburst effect achieved when shooting light sources is a result of myosis. A small aperture can turn light sources into beautiful starbursts, adding a magical touch to your photos. Furthermore, myosis allows you to capture sharp, detailed macro shots or create an impressive depth in landscape photography.
Myosis in Different Types of Photography
The application of myosis varies in different types of photography. For instance, in landscape photography, myosis is often utilized to capture sharp details across the entire frame. In contrast, in portrait photography, a larger aperture is often preferred to create a shallow depth of field and blur the background. In macro photography, myosis helps to capture minute details with precision. Hence, understanding how to control myosis in your camera can significantly enhance your photography skills.
Practical Tips to Control Myosis
Practically controlling myosis involves adjusting your camera's aperture settings. Most cameras allow you to manually set the aperture size. Remember, a smaller aperture (larger f-stop number) results in myosis, and a larger aperture (smaller f-stop number) results in miosis. You also need to balance other settings like shutter speed and ISO to maintain proper exposure. With practice, you'll be able to intuitively control myosis and capture the perfect shot every time.
Robert Urban
July 12, 2023 AT 12:08Yep, playing with the aperture is like adjusting your eye's pupil so you can control how much light hits the sensor. If you want that whole landscape crisp you just crank the f‑stop up and let the depth of field do its thing. Just remember to bump your ISO or slow the shutter if it gets too dark
Stephen Wunker
July 12, 2023 AT 12:16So you think a smaller aperture magically solves every exposure problem? In reality it just forces you to crank the ISO and risk noise, which most folks ignore
Jhoan Farrell
July 12, 2023 AT 12:33Love the breakdown! 🤓 Understanding that starburst effect is super handy for night shots, and the tip about balancing shutter speed really helps. Keep the practical advice coming! 👍
Jill Raney
July 12, 2023 AT 12:50Clearly the author missed the nuance that sensor size also influences depth of field, a detail often ignored by amateurs.
bill bevilacqua
July 12, 2023 AT 13:06Honestly, i dont see why we need to fidget about f‑stops, just use auto mode, its already perfect, right?, but if you insist, the myth about "myosis" is just a fancy word for closing the lens, nothing more, really.
rose rose
July 12, 2023 AT 13:23Stop glorifying tiny apertures; they just add diffraction.
Emmy Segerqvist
July 12, 2023 AT 13:40Wow!!! Who knew that a simple twist of the ring could spawn galaxies of starbursts!!! This is photography alchemy at its finest!!!
Trudy Callahan
July 12, 2023 AT 13:56When we speak of myosis we are, in essence, discussing the dialogue between light and perception; the aperture becomes the silent mediator, dictating the narrative of clarity versus mystery, thus every f‑stop selection is a philosophical choice.
Grace Baxter
July 12, 2023 AT 14:13The idea that "myosis" is just a technical term for a smaller aperture oversimplifies a much richer creative toolkit. While it's true that stopping down increases depth of field, it also introduces diffraction which can soften the finest details. Photographers must therefore weigh the trade‑off between sharpness across the frame and the subtle loss of crispness at very high f‑numbers. Moreover, the interplay between ISO, shutter speed, and aperture forms a triangle that cannot be ignored when adjusting myosis. If you push the f‑stop too high without compensating exposure, you end up with underexposed shadows that no amount of post‑processing can fully recover. Conversely, in bright daylight the sun itself provides ample illumination, allowing you to close the aperture and still maintain proper exposure. This is why landscape photographers often favor f‑11 to f‑16, because they get a generous depth of field while keeping diffraction within acceptable limits. Portrait shooters, on the other hand, deliberately open the aperture to isolate subjects, turning the background into a creamy bokeh that draws the eye. The starburst effect mentioned in the article is a classic by‑product of diffraction and emerges when the aperture blades form a near‑circular shape. Some modern lenses even offer rounded blades specifically to enhance this phenomenon without sacrificing overall sharpness. In macro work, stopping down can be essential to get the entire insect or flower in focus, yet you often need a tripod to counteract the slower shutter. I’d also add that sensor size matters; a full‑frame camera will give you a shallower depth of field at the same f‑stop compared to a crop sensor. This means the same "myosis" setting can feel dramatically different across camera systems, influencing composition decisions. Finally, remember that creative intent should guide technical choices; sometimes a slightly soft image from diffraction can evoke a dreamy mood that a razor‑sharp shot cannot. So treat myosis not as a rule but as a brushstroke in the larger painting of photographic storytelling.
Eddie Mark
July 12, 2023 AT 14:30Man, that was a marathon of theory! 😅 I totally get the diffraction trade‑off now, but honestly I just crank f‑8 for most hikes and let the camera handle the rest.
Caleb Burbach
July 12, 2023 AT 14:46Great point! 🎯 Balancing technical constraints with artistic vision is the sweet spot-keep experimenting and you’ll nail those perfect shots.